Maximizing Your Pet Door Width While Fitting Between Studs
Here
at The Pet Door Store, we occasionally come across a customer who has
a limited amount of space between studs in a wall and needs that full width for
the pet door flap. All pet door frames use up some of the available
area in the hole, making the flap narrower as a result. We have a
workaround for this. We helped a customer with it recently and he
came out with a really nice end result.
Steve G had a
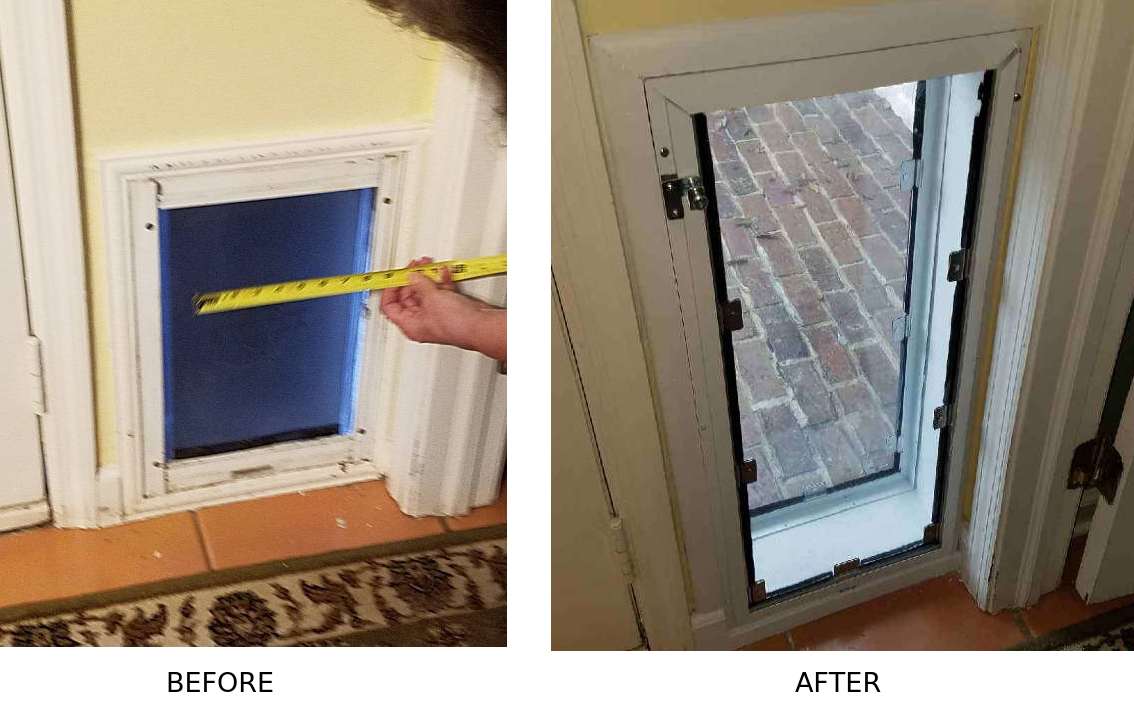
medium size dog, and had a large doggy door with an 10.5" wide and 15" tall flap installed very low in a wall
in a tight corner between two door frames. The space between the studs in the wall was
11.25” wide. He adopted a greyhound and came
to The Pet Door Store looking for options.
No pet door
had an 11.25” wide hole requirement off the shelf. We can have the
Hale pet door custom built, but the flap that would fit into a frame
that is 11.25” wide is only 9.25”, because the frame takes up two inches of space inside the opening. 9.25” might have worked, but
Steve really wanted to keep the flap as wide as possible to make sure that his
dog was comfortable.
In addition, he needed a lot more
height for the much taller greyhound, and since the existing hole was really
close to the floor, we had to get a tall flap so that the dog could
go through without having to crouch down to get through the pet door. If you have to pick between setting the door high or low, crouching down is harder for dogs than lifting their legs up, and
especially hard for elderly dogs or dogs with hip and knee issues. The rule of thumb is that you would like the top of the flap an inch or two higher than the top of the tallest dog's back.
The best size option for this greyhound was an 11”
wide, 27.5” Extra Tall Large flap by Hale Pet Doors. This pet door requires a hole
size of 13” wide x 29 5/8” tall. Knowing that the flap would
swing through the 11.25” space between the studs, he used the studs to form the sides, then added a top
and bottom piece to finish the tunnel off.
Next he built a frame for the interior and exterior of the wall with an inside dimension of 13”
x 29 5/8” and attached each frame on the surface of the wall. The pet
door was then attached to the frame. Because Steve was building the
tunnel himself, we went with the door model pet door
instead of the wall model which includes a sheet metal tunnel. The tunnel also takes up a little room in the wall, so by using the door model we maximized the flap size.
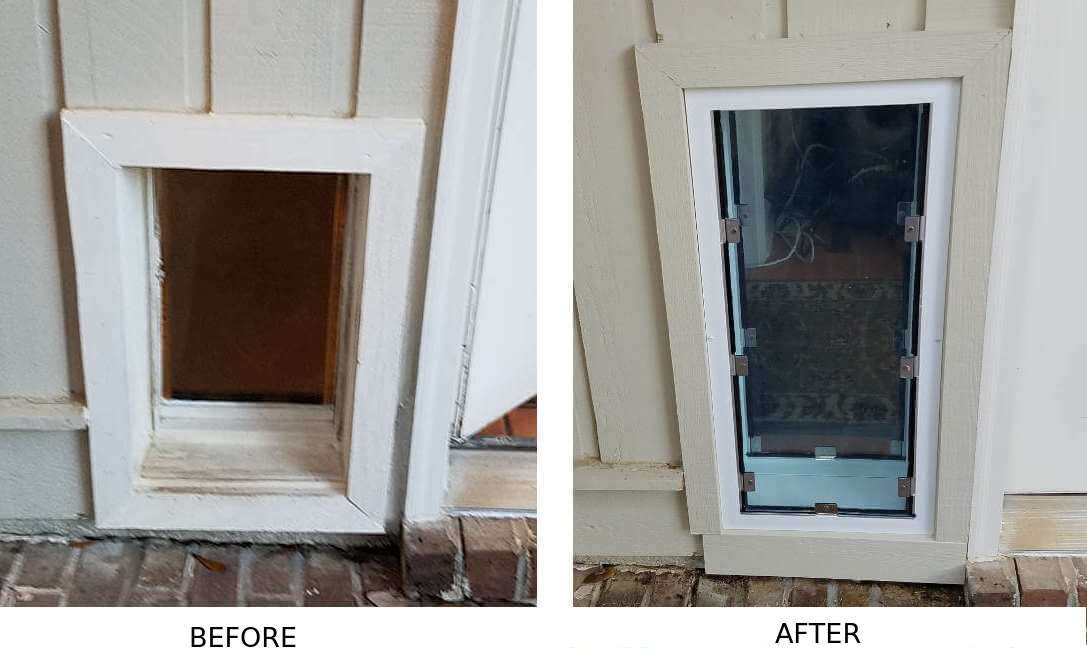
Steve was able to go from an 10.5" x 15" opening to a whopping 11" x 27.5". As you can see in his pictures below, this
really turned out nice, and allowed us to get the width and height necessary in
a very limited space. The end result looks fantastic, and doesn’t
look at all like a workaround solution!
This kind of
installation has other applications as well. One problem we see a
lot is that people with giant breeds end up having to cut a stud to
install an extra large pet door in a wall. Most Extra Large pet doors
have flaps that are 15 or more inches wide. The distance between
studs that are 16” on center is 14.5”, so there simply isn’t a
way to get a pet door with a flap greater than 14.5” wide in a wall
without cutting the stud.
The only Extra Large pet door
that fits between studs is the Endura Flap pet door, and its flap is
on the small side at only 12” wide. This is a really nice pet door, but it is only good up to about
150 lbs or so, and won’t work for the Newfoundlands, St Bernards,
and other really heavily built giant dog breeds.
Hale
makes some big 14” wide sizes which might be just the ticket here -
they have an Extra Large 14 x 19.5 and an Extra Large Plus 14 x 23.5
size. These flaps would swing between the studs, so the same trick
could be used: cut the hole in the wall between the studs. Finish off
the tunnel with a top and bottom piece. Build a frame on the inside
and outside surface of the wall to fit the Extra Large or Extra Large Plus Hale pet door, and attach the pet door to that frame. Now you
can fit that 180 lb dog through the wall without cutting a
stud!
Thanks to Steve for sharing his experience and his
pictures with us. He was a pleasure to work with and I think we came
up with a unique and really well implemented solution to his problem.


